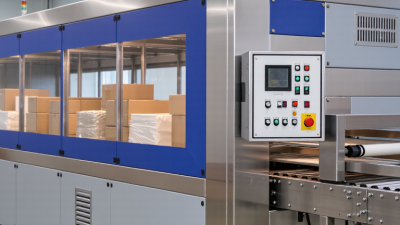
How to Choose a Heat Shrink Tunnel in 2026?

Choosing a Heat Shrink Tunnel in 2026 is less about buying the fastest machine and more about matching equipment to the package. A compact tabletop unit may suit short runs of boxed products. A high-output conveyor system may be better for steady production. The difference shows up on the line: uneven film, crowded infeed areas, and frequent temperature adjustments can slow work quickly.

Film type matters. So do package dimensions, line speed, available floor space, and the heat source. Ask suppliers for a test using your actual product and film. Watch how the package moves through the chamber. Check the seal and film finish at the tunnel exit. Small details count. A label that wrinkles under heat can turn a neat pack into a costly rework.

A verified industry expert’s perspective would strengthen this guide. Insert a confirmed quotation here: “[Verified quotation about selecting or operating a Heat Shrink Tunnel]” — [Expert name and professional title]. Do not publish an unverified attribution; a made-up quote would weaken the advice.

This guide will compare tunnel types, heating methods, controls, safety features, maintenance needs, and total operating costs. It will also explain which questions to ask before requesting a quotation. Some choices remain uncomfortable. A larger tunnel can offer flexibility, but it may consume more space and energy than your line needs. The right fit is not always obvious. Test, measure, and question assumptions before committing.
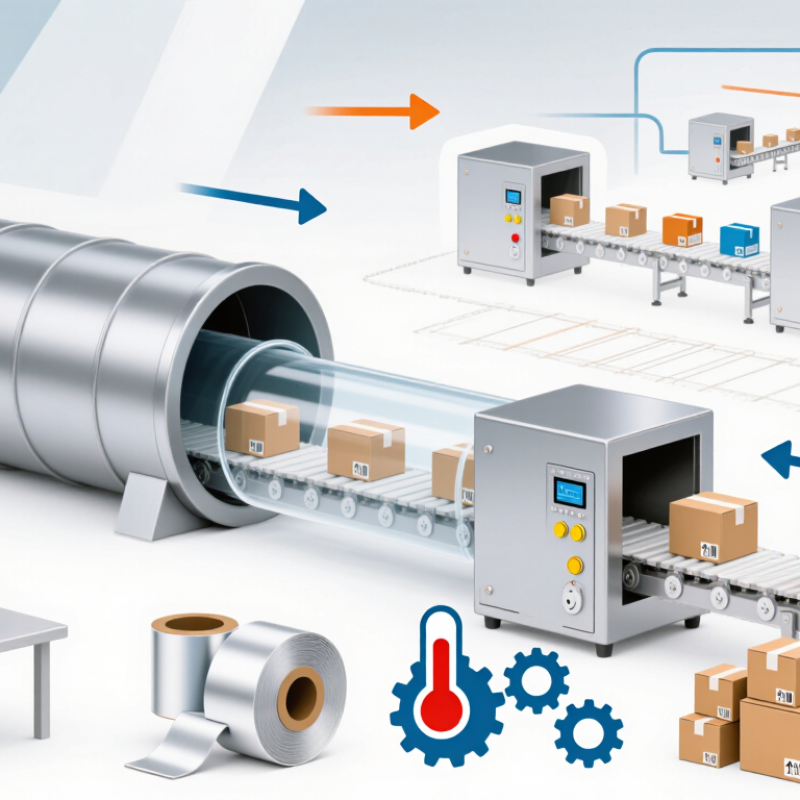
How to Choose a Heat Shrink Tunnel in 2026?

Classify the Film: PVC, POF, or PE; Check ASTM D2732 Free Shrink

Start with the film, not the machine. PVC, POF, and PE behave differently under heat, and the grade and thickness matter too. PVC can offer clear presentation, while POF is often used for retail multipacks. PE is commonly selected for heavier bundles that need a tougher package. These are tendencies, not guarantees; check the film supplier’s technical data before choosing tunnel settings.

Ask for free-shrink values measured using ASTM D2732 at a stated test temperature. The method measures shrink in the film’s machine and transverse directions after heating in a liquid medium. Compare both percentages with your package dimensions and orientation. A film that shrinks strongly in one direction may wrinkle around a rectangular tray. The test is useful, but it is not a tunnel simulation.

Run a small trial with the actual film, seals, and product. Watch for loose corners, distorted labels, or a seal that opens after heating. Then adjust temperature, airflow, and conveyor speed in measured steps. Don’t assume a single temperature suits every film. One detail is easy to miss: D2732 free-shrink results do not show seal strength or shrink force, so inspect the finished pack as well.
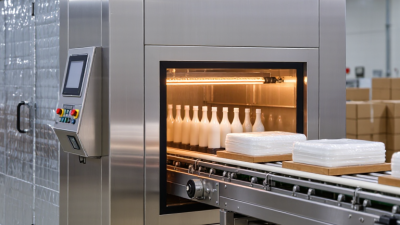
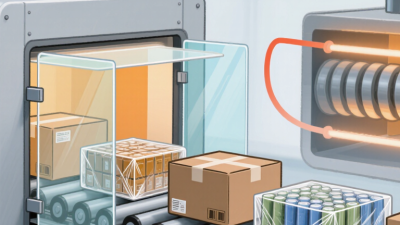
Set Film-Specific Temperature: Many Shrink Films Run at 120–200°C

Choosing a Heat Shrink Tunnel in 2026?

Set the tunnel temperature for the film, not by habit. Many shrink films operate within roughly 120–200°C, but the correct setting depends on film type, thickness, and supplier guidance. A polyolefin film may respond differently from PVC or polyethylene. Check the film’s technical data before heating the tunnel.

The display temperature is not the whole story. Conveyor speed, airflow, package shape, and distance from the heaters also affect the result. If the film wrinkles, overheats, or shrinks unevenly, adjust one setting at a time. Small changes matter. I have seen a neat-looking setup produce loose corners when the package moved too quickly.

Tips: Begin near the film supplier’s recommended range. Test a few packages, then inspect seams, corners, and surface clarity. Use a thermometer to check tunnel conditions, and record temperature and belt speed for repeatable runs. Do not guess. If the film looks cloudy or brittle, reduce heat or exposure time and test again. A setting that works for a small carton may not suit a tall, densely packed product; that is an easy detail to overlook.

Size the Chamber in mm for the Largest Pack and Required Clearance

Measure the largest finished pack, not its nominal carton size. Include film overlap, folded flaps, handles, and any product that sits off-center. For example, a wrapped pack measuring 320 × 240 × 180 mm needs more than a 320 mm-wide opening. With a trial clearance of 40 mm on each side, allow at least 400 mm of usable chamber width. Keep dimensions in millimeters on the specification sheet. It prevents inch-to-millimeter conversion errors.

Check vertical clearance from the conveyor surface to the chamber roof, then confirm the pack can pass without touching curtains or guides. Clearance must also leave room for hot-air circulation; too little can cause film wrinkles or uneven shrinking. PMMI’s 2024 State of the Industry report discusses labor and operational efficiency as ongoing packaging-line concerns. That supports checking changeover needs alongside chamber size: will another pack format fit without lengthy adjustments? A 180 mm-tall pack might need a taller opening when its film gathers at the top. Measure several real packs, including the awkward one. A small sample can mislead. Test the proposed opening at production speed before ordering, because generous clearance alone does not guarantee a consistent seal or shrink.

How to Choose a Heat Shrink Tunnel in 2026? - Size the Chamber in mm for the Largest Pack and Required Clearance
Pack type and orientation Largest pack (W × H × L), mm Starting clearance per side, mm Calculated minimum clear opening (W × H), mm Suggested clear opening (W × H), mm Sizing note
Small cartons, upright 180 × 120 × 260 50 280 × 220 300 × 250 Suitable as a starting point for compact packs; confirm clearance around seams and product edges.
Medium cartons, upright 300 × 200 × 400 75 450 × 350 500 × 400 Extra opening space can help accommodate pack variation and reduce contact with chamber walls.
Large multipacks, upright 450 × 300 × 600 100 650 × 500 700 × 550 Check that the conveyor and guides also accommodate the pack width and any overhanging film.
Tall packs, upright 250 × 450 × 350 75 400 × 600 450 × 650 Use the actual operating orientation; rotating the pack changes the required opening dimensions.
Long packs, laid flat 350 × 180 × 700 75 500 × 330 550 × 350 Pack length runs along the conveyor; verify tunnel length and belt speed separately for the required heating time.
How to use: Calculated minimum opening = largest pack width or height + twice the selected clearance. Suggested openings are rounded-up planning examples, not universal machine specifications. Confirm actual internal clear dimensions, pack orientation, film type, product heat sensitivity, conveyor loading, and shrink results with a production trial. Tunnel length and line speed determine exposure time and should be selected separately.

Match Conveyor Speed to Line Demand in Packs per Minute

A heat shrink tunnel should be sized around the line’s required good packs per minute, not its fastest advertised setting. Calculate conveyor output as belt speed divided by pack pitch, then multiply by the number of lanes. For example, a single lane moving at 18 metres per minute with packs spaced 0.5 metres apart can carry 36 packs per minute. Small gaps matter. The pack pitch must include space for stable feeding and clear film movement.

If your line needs 30 saleable packs per minute, a nominal capacity near 36 packs per minute gives roughly 17% headroom when availability is 85%. The Japan Institute of Plant Maintenance’s widely cited 85% world-class OEE benchmark is a useful planning reference, not a promise of tunnel uptime.

Check dwell time too: a faster belt may leave film insufficiently heated, causing loose corners or uneven shrink. PMMI’s 2023 State of the Industry report estimated U.S. packaging machinery shipments at about $10.9 billion, underscoring the scale of equipment investment. Yet a larger tunnel is not automatically better.

I still see speed targets chosen before anyone measures actual pack spacing; that assumption deserves a second look. Test the tunnel with your heaviest pack, cold-start conditions, and normal changeover rhythm.

Compare Heater Load in kW, Then Trial Shrink Quality and Reject Rate

How to Choose a Heat Shrink Tunnel in 2026?

Compare heater nameplate load in kW, but do not choose by that figure alone. The U.S. Department of Energy’s Improving Process Heating System Performance: A Sourcebook for Industry estimates that process heating accounts for about 36% of energy use in U.S. manufacturing. This is broad industry context, not a shrink-tunnel benchmark. A tunnel’s actual draw can change after warm-up, while its peak demand still affects electrical capacity and operating cost.

Trial the machine with your actual products, film, and line speed. Record temperature, conveyor speed, energy use per 1,000 packs, and rejects across repeated runs. Check for loose corners, wrinkles, and film scorching. A clean-looking sample is not enough; inspect packs from the start, middle, and end of each run. Compare results at matched output rates. One awkward reality: a slower tunnel may produce better shrink, but still disrupt the line.

Tips: Use a submeter if available. Change one setting at a time, and log it. Keep film and pack orientation consistent. A short trial can miss variability, so repeat it.

Shopping cart